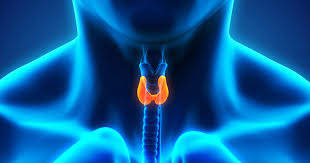
Cervical Spondylosis
The neck is part of a long flexible column, known as the spinal column or backbone, which extends through most of the body. The cervical spine (neck region) consists of seven bones (C1-C7 vertebrae), which are separated from one another by intervertebral discs. These discs allow the spine to move freely and act as shock absorbers during activity. (1)
What does the cervical spine do?
Your cervical spine has several functions, including: (2)
- Protecting your spinal cord. The nerves of your spinal cord pass through a large hole (called the vertebral foramen) that passes through the center of all of your vertebrae — from the base of your skull through the cervical vertebrae, the thoracic (middle back) vertebrae and ending between the first and second lumbar (lower back) vertebrae. Taken together, all the stacked vertebrae of your spine form a protective central canal that protects your spinal cord.
- Supporting your head and allowing movement. Your cervical spine supports the weight of your head (average weight of 10 to 13 pounds). It also allows your head and neck to tilt forward (flexion), backward (extension), turn from side to side (rotation), or bend to one side (ear-to-shoulder; lateral flexion).
- Providing a safe passageway for vertebral arteries. Small holes in cervical spine vertebrae C1 to C6 provide a protective pathway for vertebral arteries to carry blood to your brain. This is the only section of vertebrae in the entire spine that contains holes in the bone to allow arteries to pass through.
Cervical spondylosis
Cervical spondylosis (Arthritis of the Neck) is a general term for age-related wear and tear affecting the spinal disks in your neck. As the disks dehydrate and shrink, signs of osteoarthritis develop, including bony projections along the edges of bones (bone spurs). (3)
Cervical spondylosis is very common and worsens with age. More than 85% of people older than age 60 are affected by cervical spondylosis.
Symptoms
Most people experience no symptoms. When symptoms do occur, they typically include pain and stiffness in the neck.
Sometimes, cervical spondylosis results in a narrowing of the spinal canal within the bones of the spine (the vertebrae). The spinal canal is the space inside the vertebrae that the spinal cord and the nerve roots pass through to reach the rest of the body. If the spinal cord or nerve roots become pinched, you might experience: :(3)
- Pain in the neck that may travel to your arms or shoulders
- Headaches
- A grinding feeling when you move your neck
- Weakness in your arms and legs
- Numbness in your shoulders, arms, or hands
- Stiff neck
- Trouble keeping your balance, especially when walking
- Trouble controlling your bladder or bowels

Causes of cervical spondylosis
As you get older, your spine changes due to decades of normal wear and tear. Starting in middle age, the disks between your vertebrae start to change. These changes can include: (4)
- Degeneration: The spinal disks in your neck may slowly wear down (degenerate). With time, the disks become thinner, and the soft tissue has less elasticity. If you or your parents measure in a little shorter in height than you did years ago, this is normal collapsing or settling of your disks.
- Herniation: Normal aging can cause part of your spinal disk to tear or crack. This is called a herniated disk. The herniation can allow the disk to bulge out, pressing on nearby tissue or a spinal nerve. This pressure can cause pain, tingling, or numbness.
- Osteoarthritis: Osteoarthritis is a progressive (ongoing) condition that causes the cartilage in your joints to degenerate (wear down with time). With osteoarthritis, cartilage degenerates faster than normal aging.
- Bone spurs: When cartilage in the joints of the vertebrae in your spine starts to degenerate and bone tissue rubs directly against other bone tissue, abnormal bone growths develop along the edges of vertebrae. These growths (called osteophytes or bone spurs) are common as you age. Often, they cause no symptoms.
Diagnosis
Your healthcare provider will likely start with a physical exam that includes:(5) (6)
- Checking the range of motion in your neck
- Testing your reflexes and muscle strength to find out if there's pressure on your spinal nerves or spinal cord
- Watching you walk to see if spinal compression is affecting your gait
Imaging tests
Imaging tests can provide detailed information to guide diagnosis and treatment. Examples include:
- Neck X-ray. An X-ray can show changes in the spine, such as bone spurs, that indicate cervical spondylosis. Neck X-rays can also rule out rare and more serious causes of neck pain and stiffness, such as tumors, cancer, infections, or fractures.
- MRI. Using radio waves and a strong magnetic field, MRI can produce detailed images that can help pinpoint areas where nerves might be pinched.
- CT myelography. In this type of CT scan, a dye is injected into the spinal canal to provide more-detailed imaging. This test makes it easier to see the details of the spinal cord, spinal canal, and nerve roots.
Nerve function tests
You may need tests to determine if nerve signals are traveling properly to your muscles. Nerve function tests include:
- Electromyography. This test measures the electrical activity in your nerves as they transmit messages to your muscles when the muscles are contracting and at rest.
- Nerve conduction study. Electrodes are attached to the skin above the nerve to be studied. A small shock is passed through the nerve to measure the strength and speed of nerve signals
Treating cervical spondylosis
Treatments for cervical spondylosis focus on providing pain relief, lowering the risk of permanent damage, and helping you lead a normal life.
Nonsurgical methods are usually very effective.
Physical therapy
Your doctor might send you to a physical therapist for treatment. Physical therapy helps you stretch your neck and shoulder muscles. This makes them stronger and ultimately helps to relieve pain. (7)
You might also have neck traction. This involves using weights to increase the space between the cervical joints and relieve the pressure on the cervical discs and nerve roots.
Medications
Your doctor might prescribe certain medications if over-the-counter (OTC) drugs don’t work. These include: (7)
- muscle relaxants, such as cyclobenzaprine, to treat muscle spasms
- narcotics, such as hydrocodone, for pain relief
- anti-epileptic drugs, such as gabapentin, to relieve pain caused by nerve damage
- steroid injections, such as prednisone, to reduce tissue inflammation and subsequently lessen pain
- prescription nonsteroidal anti-inflammatory drugs (NSAIDs), such as diclofenac (Voltaren-XR), to reduce inflammation
Surgery
If your condition is severe and doesn’t respond to other forms of treatment, you might need surgery. This can involve removing bone spurs, parts of your neck bones or herniated discs to give your spinal cord and nerves more room.
Surgery is rarely necessary for cervical spondylosis. However, a doctor may recommend it if the pain is severe and it’s affecting your ability to move your arms.
Home treatment options
If your condition is mild, you can try a few things at home to treat it: (7)
- Take an OTC pain reliever, such as acetaminophen or an NSAID, which includes ibuprofen and naproxen sodium.
- Use a heating pad or a cold pack on your neck to provide pain relief for sore muscles.
- Exercise regularly to help you recover faster.
- Wear a soft neck brace or soft collar to get temporary relief. However, you shouldn’t wear a neck brace or collar for long periods because that can make your muscles weaker.
Makkah Pharmacy recommends:


5 easy-to-follow at-home exercises to reduce cervical spondylosis pain: (8)
Push forward
This exercise is very easy to follow and also helps better flexibility in the neck. Here's how to perform the neck push-forward exercise:
- Stand straight
- Try to push your neck forward as far as possible
- At this point, your neck would be protruding forward ahead of the rest of your body
- Hold this stretch for a few snoods and release
- Repeat it a few times daily
Neck tilts
Neck tilts as the name suggests helps in stretching the neck in different directions and help relieve pain and stiffness. Here is how you can practice neck tilts.
- Try to place your head on your right shoulder
- At this point, your right ear should be touching your right shoulder
- Hold this position for a few seconds
- Now witch, with your head resting on your left shoulder
- Repeat this at least 4-5 times, a few times a week, or whenever you feel discomfort
Neck bowing
Similar to the pushing the neck forward exercise, neck bowing focuses on stretching the neck out as far as possible. A combination of these two regularly can ensure better flexibility and a reduction in pain in the neck. Here's how you perform the neck-bowing exercise:
- Try to rest your neck on your chest
- In this position, your chin should be touching your chest
- Hold this position for a few seconds and release
- Repeat this along with push forward exercise, alternatively
- Repeat at least 3-4 times
Look behind
As the name suggests, the looking behind neck exercise focuses on stretching the neck behind. For this exercise, the motive is to turn your neck around in an attempt to see behind you. Here's how to practice the look behind the exercise:
- Stand straight and turn your neck to the left as far behind as you comfortably can
- Hold for a few seconds
- Repeat on the other side
- Repeat this set 4-5 times or more, however comfortable
- Please note that your body must stay in the same position and angle throughout
Raised shoulders
This is another easy-to-follow exercise for cervical spondylosis. It also helps release tension from the neck and promotes a calming feeling. This is how to practice raised shoulders:
- As the name suggests, try to raise your shoulders as you normally would
- At this point, your shoulders might be touching your ears
- Hold this position for a few songs and release
- You can practice this position 10-15 times daily to reduce pain and stiffness
References:
1. Cervical Spine – Anatomy, Diseases, and Treatments [Internet]. [cited 2023 Feb 21]. Available from: https://www.aans.org/en/Patients/Neurosurgical-Conditions-and-Treatments/Cervical-Spine
2. Cervical Spine (Neck): What It Is, Anatomy & Disorders [Internet]. [cited 2023 Feb 21]. Available from: https://my.clevelandclinic.org/health/articles/22278-cervical-spine
3. Cervical spondylosis - Symptoms and causes - Mayo Clinic [Internet]. [cited 2023 Feb 21]. Available from: https://www.mayoclinic.org/diseases-conditions/cervical-spondylosis/symptoms-causes/syc-20370787
4. Cervical Spondylosis: Symptoms, Causes, Treatments [Internet]. [cited 2023 Feb 21]. Available from: https://my.clevelandclinic.org/health/diseases/17685-cervical-spondylosis
5. Theodore N. Degenerative Cervical Spondylosis. New England Journal of Medicine. 2020 Jul 9;383(2):159–68.
6. Cervical spondylosis - Diagnosis and treatment - Mayo Clinic [Internet]. [cited 2023 Feb 21]. Available from: https://www.mayoclinic.org/diseases-conditions/cervical-spondylosis/diagnosis-treatment/drc-20370792
7. Cervical Spondylosis: Causes, Symptoms, Home Treatments, and More [Internet]. [cited 2023 Feb 21]. Available from: https://www.healthline.com/health/cervical-spondylosis#treatment
8. Cervical Spondylosis: 5 Exercises To Reduce Neck Pain [Internet]. [cited 2023 Feb 21]. Available from: https://www.ndtv.com/health/cervical-spondylosis-5-exercises-to-reduce-neck-pain-2988112